A Loving Atma Namaste,
Just finished GMCKS Twin Heart Meditation

A Loving Atma Namaste,
Just finished GMCKS Twin Heart Meditation

Hello buddy,
I want to share something with you about Easy way to Change Woocommerce default user Role customer to something you need or like. I was working on LMS project so wrote down few lines of code that I want to share with you. May it help you.
Woocommerce allows WordPress user registration at checkout and my account page. It creates user by default role as customer. But for purpose of your project,sometime you may need other role other than customer. As in LMS project, I wanted user to have student role, who registers at checkout page. So not need to worry for that. Woocommerce Gives a control over it using via a filter `woocommerce_new_customer_data`.
In \wp-content\plugins\woocommerce\includes\wc-customer-functions.php : line 102
<?php
$new_customer_data = apply_filters( 'woocommerce_new_customer_data', array(
    'user_login' => $username,
    'user_pass'  => $password,
    'user_email' => $email,
    'role'       => 'customer'
) ); ?>
In above lines extracted from Woocommerce, woocommerce_new_customer_data is filter applied over $new_customer_data variable. Still user is not registered, so you can deal with users data as you wish, wp user get created.
You can filter User Role by changing value in Array ($new_customer_data) provided by woocommerce_new_customer_data filter. You must use add_filter action in you theme’s function.php file or your plugin file. Write your own function like my_new_customer_data().
Dafault format of filter is as below.
<?php add_filter( $tag, $function_to_add, $priority, $accepted_args ); ?>
You have to pass minimum 2 parameters to add_filter action. i.e. $tag, $function_to_add
<?php add_filter( 'woocommerce_new_customer_data', 'my_new_customer_data'); ?>
In your function just have to replace value of key index which is ‘role’. You can directly specify user role like option one as shown below or You can get default user role from WordPress default user role option(Which is in general settings) like option two.
<?php $new_customer_data['role'] = 'student'; ?>
<?php $new_customer_data['role'] = get_option( 'default_role' ); ?>
Hence finally you just have to add below lines of code to your theme or plugin. Enjoy WordPress and Woocommerce with your project. Happy coding. 🙂 🙂 🙂
<?php
function my_new_customer_data($new_customer_data){
 $new_customer_data['role'] = get_option( 'default_role' );
 return $new_customer_data;
}
add_filter( 'woocommerce_new_customer_data', 'my_new_customer_data');
?>

This tutorial is for you if you are searching for Force entire WordPress website over SSL/HTTPS or Force entire website over SSL/HTTPS or Redirect all request from http to https
Its is very easy using .htaccess file. If you have access to server files and you are using apache server for your website. Go to server web root directory. Edit .htaccess file and add below lines of code before WordPress rewrite code which starts with # BEGIN WordPress Or if you running a non WordPress website, then add this code before any rewrite code or at start of .htaccess file.
# Begin Force website over SSL by MakarandMane.com

RewriteEngine On
RewriteCond %{THE_REQUEST} ^[A-Z]{3,9}\ /(.*)\ HTTP/ [NC]
RewriteCond %{HTTPS} !=on [NC]
RewriteRule ^/?(.*) https://%{SERVER_NAME}/$1 [R=301,QSA,L]

# End Force SSL
If you are not familiar with htaccess or you don’t want to touch htaccess file or You want to handle WordPress, then you can also force website to https using php header funciton or WordPress wp_redirect. You can use any one method to redirect page.
header('HTTP/1.1 301 Moved Permanently');
header("Location: https://" . $_SERVER["SERVER_NAME"] . $_SERVER["REQUEST_URI"]);
wp_redirect('https://' . $_SERVER['HTTP_HOST'] . $_SERVER['REQUEST_URI'], 301 );
You have to use WordPress template_redirect action to redirect web-pages.
add_action('template_redirect', 'force_ssl');
We have write a function for this action. In function force_ssl we will check whether current page is opening on ssl using is_ssl() WordPress conditional function. I am writing same function using both method we discussed above. Both works same way.
function force_ssl()
{
if (!is_ssl () )
{
header('HTTP/1.1 301 Moved Permanently');
header("Location: https://" . $_SERVER["SERVER_NAME"] . $_SERVER["REQUEST_URI"]);
exit();
}
}
function force_ssl()
{
if (!is_ssl () )
{
wp_redirect('https://' . $_SERVER['HTTP_HOST'] . $_SERVER['REQUEST_URI'], 301 );
exit();
}
}
If you want to disable to force SSL you have to comment or remove code. But every time you to go theme files and make changes. So better way if we make a switch which can help us to enable and disable SSL mode by doing small change. So for this purpose we can define a constant in wp-config file.
define('FRONT_END_SSL' , false);
We will add action if contrast FRONT_END_SSL is defined. Then if website is not running on ssl and constant is set to true we will redirect visitor to https.
if (defined('FRONT_END_SSL'))
  add_action('template_redirect', 'force_ssl');

function force_ssl(){

if ( FRONT_END_SSL && !is_ssl () )
 {
  wp_redirect('https://' . $_SERVER['HTTP_HOST'] . $_SERVER['REQUEST_URI'], 301 );
  exit();
 }
}
https://yoast.com/wordpress-ssl-setup/
http://www.wpwhitesecurity.com/wordpress-security/definitive-guide-wordpress-ssl-setup/

Hey guys,
There are many ways to Create Bootable USB mac osx installer, but I am going to explain only useful information here.
*** ONLY IF ABOVE WON’T WORK!
UltraMDG from SYSGeeker is an easy-to-use application helping you to create a bootable USB installer from macOS without clicks, no command required and risk free. It supports burning 5+ image file to USB flash drive or DVD/CD, including DMG, Bin, Img and Raw and support the latest macOS monterey and big sur.
Step 1. First of all, you need to download and install UltraDMG on your Mac or windows computer, then launch it.
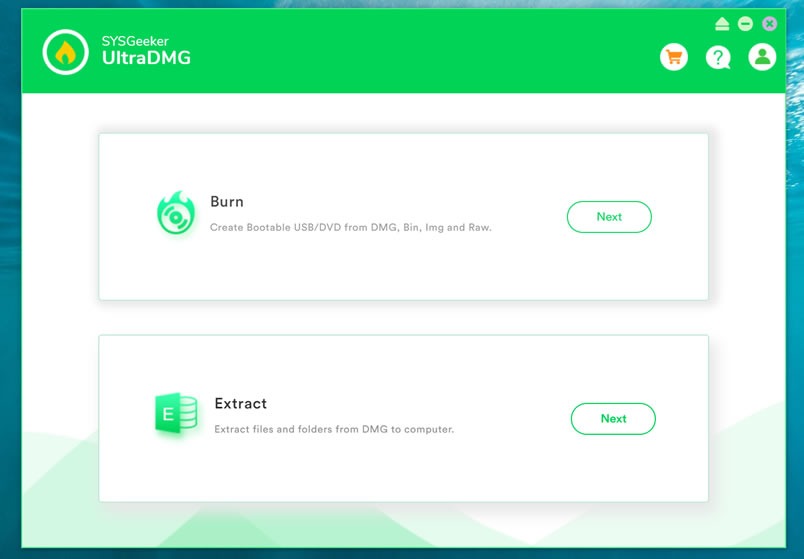
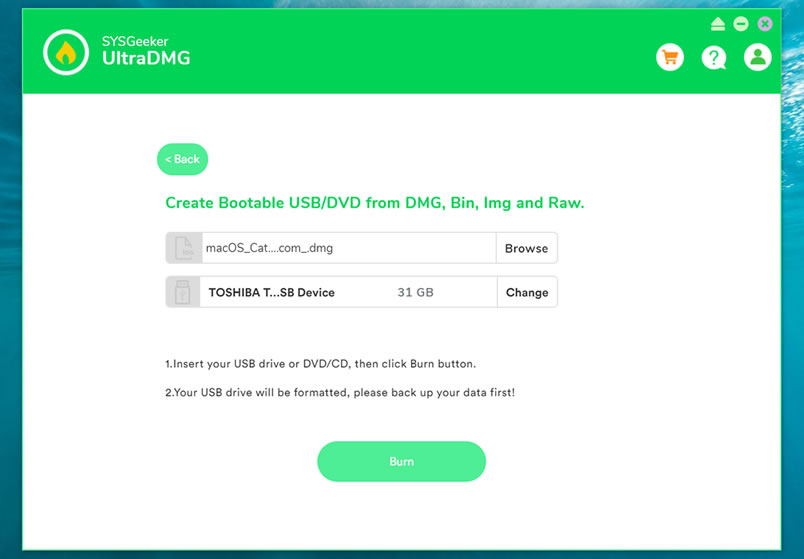
Step 2. To create a macOS bootable USB drive, you need to select ‘BURN’ option and browse your local DMG file, then connect your USB flash to your computer.
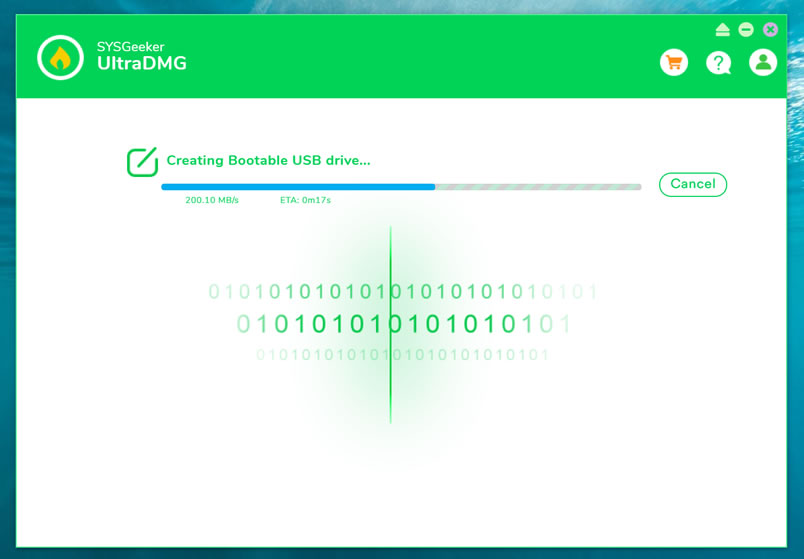
Step 3. It will take about 10 minutes to finish the burning process, please wait it to be completed, and don’t disconnect your USB drive during the burning.
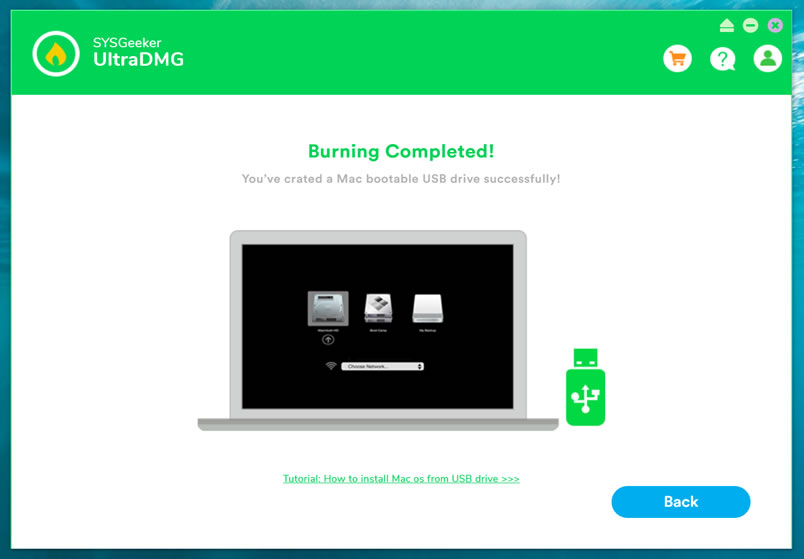
Step 4. When it shows “Burning Completed”, means you’ve successfully created a macOS installer. Now, you can connect your USB to your broken Mac computer and install the new macOS.
There are numerous situations when a bootable USB macOS installer may come in handy, SYSGeeker UltraDMG will be your best assistant to help you easily reinstall mac system without complicated command line. It allows every novice to reinstall the system by themselves.
I Hope it helps!
*** When I was trying to make a mac OS X usb bootable drive, I googled so much & found many blogs telling me how to make it form running Mac OS. But no one tells, how to make Mac OS X bootable installer pen drive from windows. I hope it will help you. For any reply or suggestions please comment.
Make sure you have Ubuntu 18.x on the server and you have root access.
Then run this command:
wget -qO- https://ubuntu.bigbluebutton.org/bbb-install.sh | bash -s -- -v bionic-230 -s yourdomain.com -e [email protected] -w -g
EDIT:
nano /etc/nginx/sites-available/bigbluebutton
Add this code at the bottom of the file
location = / {
        return 307 /b;
}
Then restart NGINX server
sudo systemctl restart nginx
cd ~/greenlight
docker pull bigbluebutton/greenlight:v2
docker-compose down
docker-compose up -d
cd ~
sudo bbb-conf –status
And we are done.
tulasi ke patte
lili chai
adrak
5 mari ko powder (black paper)
Gud little
pudina
3-4 ubal ne ka
limbu later
50 nim ke patte
crush & make juice
garam pani me nimbu every 2-3hrs
3din
1 spoon khadi sugar2 spoon miri powder
In windows we can access the Remote Desktop by using a remote desktop app provided by the windows. In order to successfully access the remote desktop we first need to do some simple setting in : Remote Desktop setting we have to enable the “Enable Remote Desktop” option. Then by using the Desktop name you can access the remote desktop.
But when we try to access the remote computer with simple settings currently active user on the remote computer can not access the remote computer. If a remote computer has multiple user accounts on the computer then we can access the other user without disturbing currently active users on the remote computer i.e. we can make remote desktop connections for multiple users without disturbing currently active user.
To allow multiple remote desktop connections we need to modify the termsvrl.dll which restricts the number of RDP (Remote Desktop Protocol) connections to one. There are two methods developed to enable the multiple RDP session without disturbing currently active user of remote desktop.
In this tutorial we will study the second method to allow multiple RDP sessions on windows 8 or 10.
RDP Wrapper is a free open source project to enable Remote Desktop Host support and allow us to access remote desktop connections for multiple users without disturbing currently active user.It works as a layer between Service Control Manager and Terminal Services, so we can access the remote desktop without modifying the original termsrv.dll file.
To use the RDP wrapper you must have the original termsrv.dll if you have made some changes or patched it before, it may not work or it will crash any time. So take care of that.
https://github.com/stascorp/rdpwrap/releases (v1.6).

RDPWrap-v1.6.2.zip archive contains some files:
RDPWinst.exe — an RDP Wrapper Library install/uninstall program
RDPConf.exe — an RDP Wrapper configuration utility
RDPCheck.exe — Local RDP Checker
install.bat, uninstall.bat, update.bat — batch files for installation, uninstallation and update of RDP Wrapper
Open install.bat file with the Administrator privileges. It will install the RDP Wrapper.
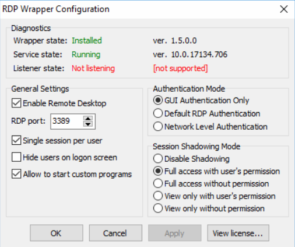
Open RDPConf.exe with Administrator privileges. Make sure that all elements in the Diagnostics section are green. (If your all elements in the Diagnostic section are in the green then you are ready to connect the remote desktop )

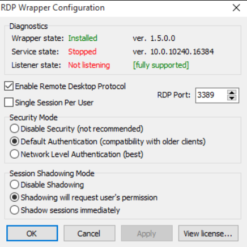
Check TermService is not stopped. To start TermService try command
net start termservice
net stop termservice
net start termservice
Note: If still rdpwrap.ini version is [ not supported] then try another version of rdpwrap.ini. You will get a different file of rdpwrap.ini on github. For me the above file is worked.
Network Level Authentication decides the user’s credentials from the client through a client-side Security Support Provider and It do the authenticate before establishing a session on the server. Network Level Authentication was introduced in RDP 6.0 .
A user will have the same view of desktop/running apps whether its login directly from the console, or (later) logging in through remote desktop. Obviously only one session for that user can be connected at the same time.
Step 6: Save the changes and reboot.
Now try to connect the Remote Desktop. And access the user which is currently not working. This way you can access the remote desktop without disturbing currently active user.
This way by modify the termsvrl.dll which define the number of RDP session you can allow remote desktop connections for multiple users on windows 10 or 8.

Hey Friends,
Very much excited to tell you about this Black Friday Sale. I am waiting from may days for Black friday sale at hostgator.com
This sale will live from Black Friday through Cyber Monday… Starting at $2.23/month
Black Friday pricing of 75% is now active. These are the lowest prices for web hosting this year; take advantage of these deep discounts!
CYBER MONDAY:
Hurry Up! This is limited time offer

Free dot com domain and 10% off on hosting

Hostgator is back with an aggressive Flash Sale schedule for August, the first of which is right around the corner! During the period of the 3rd of August through the 11th of August, there will be three different flash sales providing a 60% off discount during their allotted time.
The offer is only valid on new hosting packages, not applicable on Optimized WP packages, renewals or existing hosting plans.
Here are the details for the upcoming June Flash Sales:
Keep an eye out for more Flash Sales coming later this month as well!

Happy Holidays from HostGator! ‘Tis the season to celebrate with 75% off new hosting! HostGator will be running a flash sale tonight at 12am CST, and another one at 10am CST. Both flash sales will run for three hours. Here are the sale details:
The offer is only valid on new hosting packages, not applicable on renewals or existing hosting plans. Please see our Sale FAQ for more details.
Free dot com domain and 10% off on hosting

Hey Friends,
Very much excited to tell you about this Black Friday Sale. I am waiting from may days for Black friday sale at hostgator.com
Black Friday has officially begun! They are starting things off with a FIRE SALE, 75% off ALL new hosting plans. This sale ends at 3PM CST, but there will be more Fire Sales throughout the day. Everything is live right now at http://www.hostgator.com/ though the related coupon code for this initial Fire Sale is BFFIRE2. Happy Black Friday, everyone. Stay safe out there!
This sale will live from Black Friday through Cyber Monday… Starting at $1.24/month
Black Friday pricing of 75% is now active. These are the lowest prices for web hosting this year; take advantage of these deep discounts!
Free dot com domain and 10% off on hosting
Copyright 2011-2026. Makarand Mane - All rights reserved. Powered by WordPress


